If you’re a greenhouse gardener looking for a sustainable way to keep your crops warm during the winter and cool during the summer, you may be interested in building a climate battery. Climate batteries go by several names, including earth tubes and earth batteries.
Whichever name you use, these ground-to-air heat transfer systems are a great way to manage the temperature in any greenhouse. They may sound complicated, but nearly any gardener can build one themselves with a bit of research.
What is a Climate Battery?
If you’re new to the world of greenhouses or sustainability, you might be unfamiliar with the concept of a climate battery. Simply put, it’s a ground-to-air heating system consisting of a series of tubes that circulate air below the soil’s surface.
That air circulation provides temperature and moisture regulation. Climate batteries are a low-tech solution for gardeners that want to avoid or minimize heating with propane or electricity. Additionally, by controlling the humidity within the greenhouse, climate batteries can help reduce the potential for disease in your crops.
You can always gain additional control over humidity by installing a simple humidifier or dehumidifier too.
One of the benefits of using a climate battery over propane or electric heat is the cost. The entire system requires only low-cost materials. Climate batteries require little maintenance, can be fitted to any size tunnel, and cost little to run beyond the use of fans.
How Does a Climate Battery Work?
When examining the cost of a climate battery, you may be thinking that it’s too good to be true. However, once you understand how the system works, you’ll better understand what makes an earth tube the ideal solution for many sustainability-focused greenhouse gardeners.
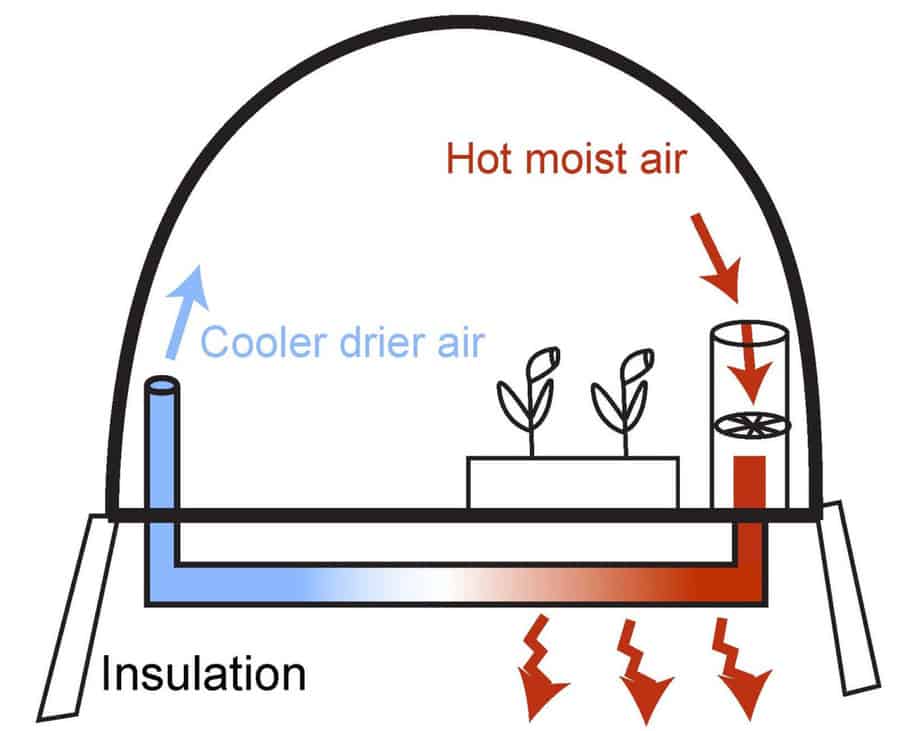
During the day, the sun heats the air contained in the greenhouse. Fans then push that warm air from inside the greenhouse into the underground tubes. The heat and moisture from the air are transferred to the subsoil, releasing cooler, drier air back into the greenhouse.
If your weather is unusually cold or cloudy, you can activate fans to transfer warm air from the underground tubes into the greenhouse.
Is a Climate Battery Right for Me?
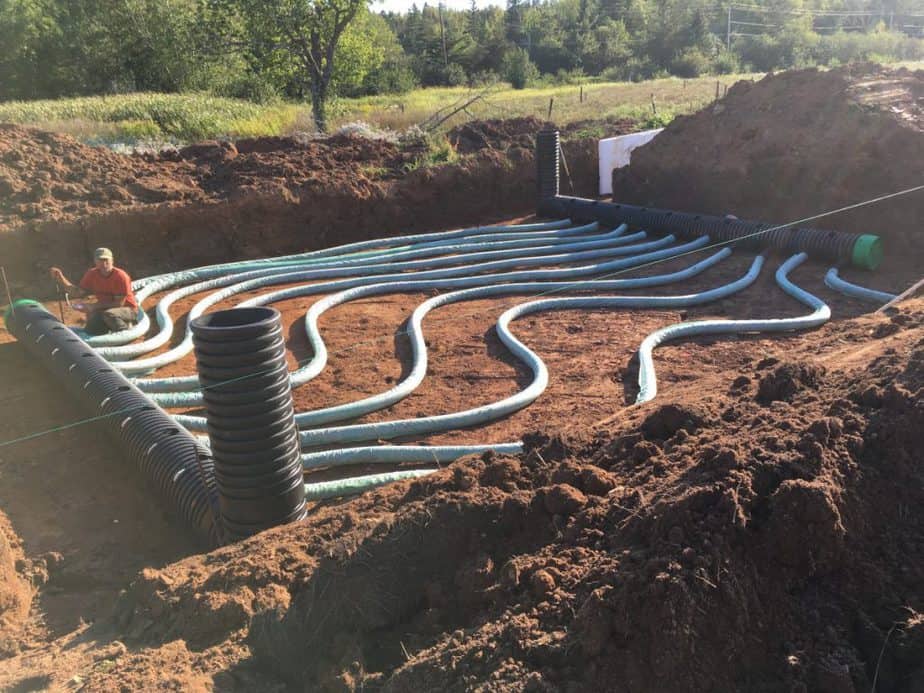
It’s important to note that climate batteries are not ideal for all greenhouses. They really only work under certain conditions, the most important being your climate. If you live in a climate where temperatures during the day aren’t much warmer than at night, your earth tube may not be able to heat or cool your greenhouse very well.
Learn more about your climate here.
Additionally, the duct located below the soil’s surface must be deep enough. Based on your climate, this depth is typically around three or four feet below ground but may need to be as deep as eight feet or more. The duct must also be long enough with a large enough diameter for air to effectively move through it.
Finally, climate batteries must be correctly installed to minimize the problems associated with excess condensation. Incorrect installation can easily result in mold-infested tubes. For some gardeners, this may mean consulting a professional for installation.
Although climate batteries require inexpensive materials and cost little to maintain, installation can be pricy, especially if you have your’s installed by a professional, so it’s essential to do your research before the outset.
Before Building a Climate Battery
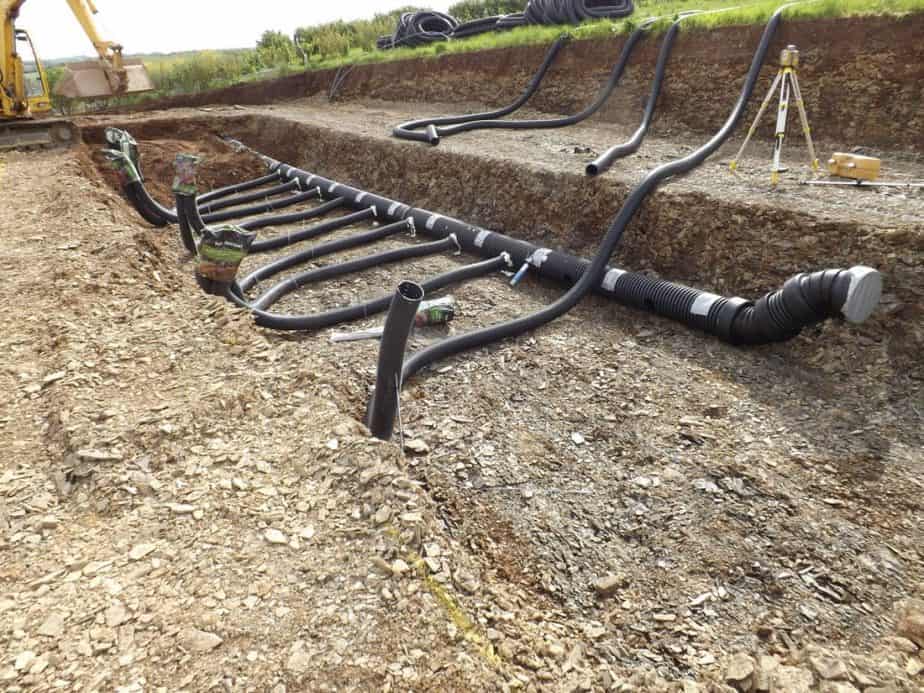
Before you begin building your climate battery, you need to develop a thorough plan. Some research may be required to determine the ideal depth for your tubes, but you must bury it at least 12 inches below the soil’s surface.
This minimum depth is required to prevent accidental damage to the tubes during tilling or planting. You’ll also need to place the layers of tubing around 9 to 12 inches apart to maximize the system’s efficiency.
You’ll also need to determine what kind of fans you’ll need based on the diameter of your tubing. The ideal air exchange rate is about five feet per second or having the entire air volume in the greenhouse turned over five times per hour.
The air needs to stay in the tubing for between three and five seconds for it to cool enough to reach the dew point. Air moving any faster or slower than that will reduce the efficiency of the entire system.
Although supplemental heat is not required, it is recommended. If you have a few freezing nights in a row, it will significantly reduce the heat storage capacity of the entire system for several days. Providing the greenhouse with another form of heat during those cold periods will keep the system running more consistently in the days that follow.
Building a Climate Battery
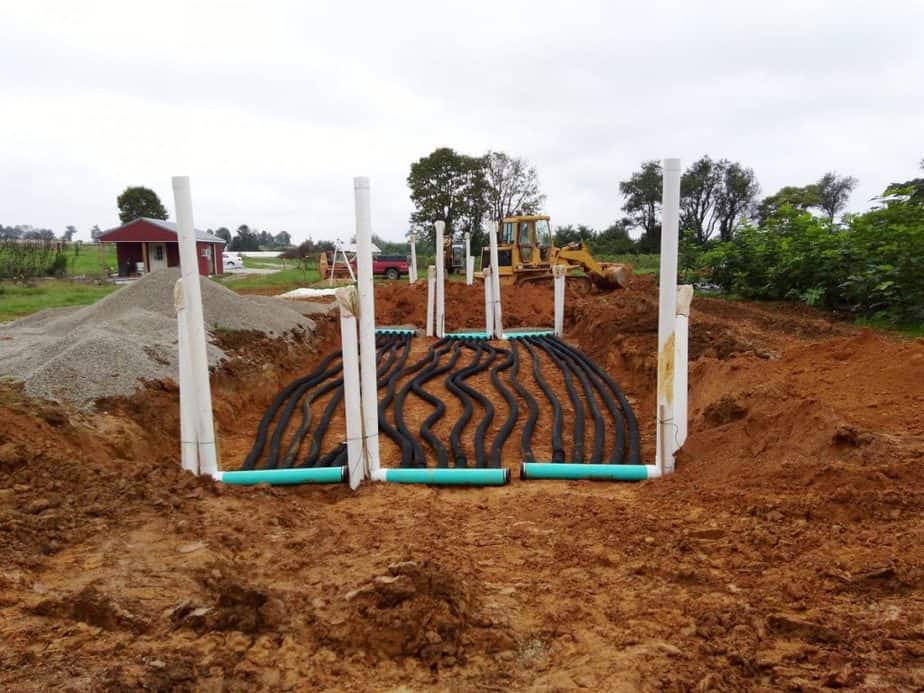
The first step in building a climate battery is gathering your supplies. The exact supplies you need, as well as the quantity of each, will depend on the specific system you’re building.
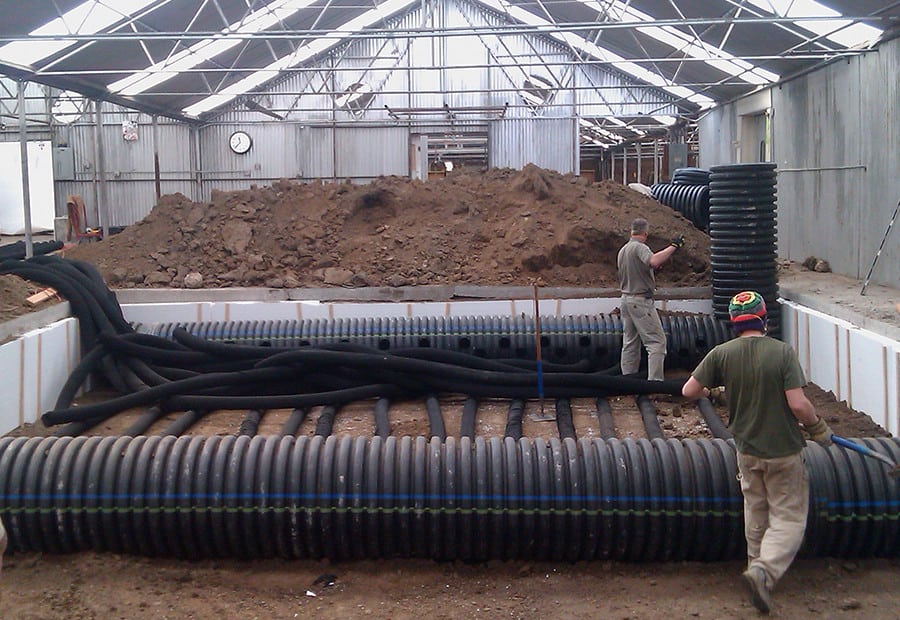
You may need heat exchange tubing, manifolds, risers for pulling air in and out of the underground tubes, and rigid foam insulation. You may also need intake riser extension ducting, intake fans, fan controllers, and a thermostat to monitor your greenhouse environment.
The first step in installation is to dig your trench below your greenhouse. Again, this depth will vary according to your climate and needs. Just remember to space your tubes appropriately to maximize the efficiency of the system. Some gardeners also recommend backfilling with gravel for ideal moisture and temperature exchange.
Once the tubes are buried in place, you’ll need to install the fans and any thermostat or other monitoring system you may want in place. As you connect each section of your system, it’s crucial to ensure that everything is sealed correctly to reduce air leakage. Doing this can, in turn, reduce airflow.
Again, if you have any concerns about installing your earth tube, it’s best to consult a professional. Incorrectly installed climate batteries are not only ineffective, but they can be costly to repair or correct, so it’s best to do things right the first time.

